
A TV stand does more than hold a television. It can organize electronics, hide cables, provide storage, and give an entire room a cleaner appearance. The good news is that you do not need advanced woodworking skills or expensive materials to create one. With a thoughtful design, basic tools, and accurate measurements, you can build a modern minimalist TV stand that fits your room instead of trying to adapt your room to ready-made furniture.
Modern DIY plans show that plywood, dimensional lumber, screws, pocket-hole joinery, and a simple finish can be combined to create attractive media furniture. Established woodworking plans also demonstrate how the same basic concept can be modified with drawers, doors, open shelves, or a different overall width. The important part is designing the stand around your television, equipment, available space, and storage needs.
Quick Project Information
| Detail | Information |
| Project type | DIY modern TV stand |
| Design style | Minimalist, modern, clean-lined |
| Best materials | ¾-inch plywood, solid lumber, or quality furniture-grade board |
| Common frame material | 2×2 lumber |
| Storage options | Open shelves, drawers, cabinets, or a combination |
| Useful feature | Rear cable-management openings |
| Recommended approach | Measure the television and room before cutting |
| Suitable rooms | Living room, bedroom, apartment, gaming room, guest room |
| Finish options | Paint, stain, clear protective finish |
| Safety priority | Stable construction and proper TV/furniture anchoring |
Start With the Television
The television should be the starting point rather than the final consideration.
Measure the actual TV, including its feet or stand if it will sit on the furniture. Also measure the depth of the television and any devices that need to sit below or beside it.
A TV stand does not have to match the exact width of the screen. In fact, many furniture manufacturers recommend making the stand somewhat wider than the television. IKEA, for example, advises that a TV bench should be a little wider than the TV placed on it. This gives the furniture a more balanced appearance and provides additional surface space.
Before cutting any wood, write down the television width, height, depth, and weight. Then add the dimensions of your soundbar, gaming console, streaming device, receiver, or other equipment.
The goal is to design around real measurements instead of guessing.
Measure the Room
A beautiful TV stand can still be a poor choice if it makes the room difficult to use.
Measure the wall where the television will be placed. Check the available width, floor clearance, nearby doors, windows, outlets, vents, and walking paths.
For a small apartment, a shallow console may be more practical than a deep entertainment center. A larger living room can accommodate a longer unit with additional storage.
Also consider the height of the finished piece.
If you are placing the television directly on top, make sure the viewing position feels comfortable from the sofa or chair. If the TV will be wall-mounted above the console, you have more freedom with the furniture’s height.
Measure the room before purchasing materials, not after.
Choose the Right Material
There are several ways to build a minimalist TV stand.
Plywood is one of the most practical choices because it is relatively stable, easy to cut, and available in different grades. Furniture-grade plywood can provide a cleaner surface for painting or clear finishing.
Current woodworking plans from Ana White use ¾-inch plywood for major cabinet components and ¼-inch plywood for the back of a media console. The same plans combine plywood with 1×2 and 2×2 lumber for framing and structural support.
A Home Depot modern TV-console project also uses ¾-inch plywood together with 2×2 boards, showing that a contemporary furniture design can be built from readily available materials rather than specialized cabinet-making stock.
For a beginner project, plywood can be a sensible compromise between appearance, strength, and ease of construction.
Decide on the Shape
Minimalist furniture usually benefits from a simple shape.
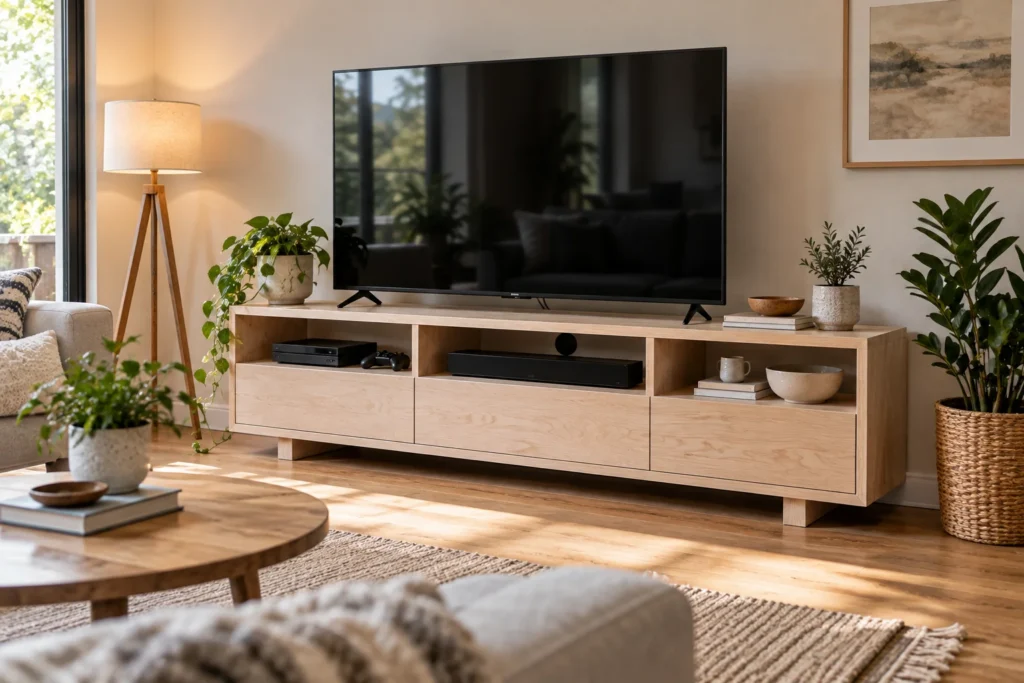
A basic rectangular cabinet with straight sides can look modern without complicated curves or decorative details. You can add personality through the wood grain, paint color, legs, doors, or handles.
There are several practical designs to consider.
An open-shelf console is easy to build and provides good airflow around electronics.
A closed cabinet creates a cleaner appearance because devices and accessories can be hidden behind doors.
A drawer-based console works well for remotes, controllers, cables, batteries, and smaller accessories.
A floating TV console can create an especially clean appearance while leaving visible floor space underneath.
Choose the structure based on what you actually need to store.
Plan the Storage
Storage should be decided before construction begins.
Think about everything that currently sits around your TV. You may have a streaming box, gaming console, controllers, DVDs, remote controls, headphones, sound equipment, or power accessories.
Open shelves make devices easy to reach, but they also leave equipment visible.
Doors hide visual clutter, while drawers are useful for smaller objects.
A combination can be more practical. For example, you could keep a gaming console or receiver in an open center compartment while using closed cabinets for accessories.
Minimalism does not mean having no storage. It means giving every visible item a sensible place.
Keep the Stand Slightly Wider
Proportion has a major effect on how furniture looks.
If the console is exactly the same width as the television, the arrangement can feel cramped. A slightly wider console usually creates a stronger visual base.
IKEA’s current BESTÅ TV benches provide a useful real-world reference. One U.S. configuration is approximately 70⅞ inches wide and 16½ inches deep, while other configurations extend to more than 90 inches in width.
These commercial examples should not be copied blindly. They are useful benchmarks showing how modern TV furniture commonly combines a wider horizontal shape with relatively modest depth.
For your DIY design, allow enough width for the TV plus whatever additional surface area you want.
Keep the Depth Practical
Depth is easy to overlook.
A very deep TV console takes more floor space and can make a small room feel crowded. A very shallow console, however, may not provide enough room for equipment or cable connections.
IKEA’s BESTÅ range includes configurations around 15 to 16½ inches deep, demonstrating that a modern media console does not necessarily need to be extremely deep.
Your required depth should depend on the equipment you own.
Measure the deepest device and allow additional room for connectors and cables. Do not design the compartment so tightly that you have to bend HDMI or power cables sharply.
Furniture should accommodate your equipment, not force your equipment into an awkward position.
Build a Strong Frame
Once the dimensions are finalized, construction can begin with the frame.
A common DIY approach is to use 2×2 lumber for structural sections and plywood for cabinet panels. The Home Depot modern TV-console plan follows this basic approach and uses pocket-hole joinery to connect frame components.
Begin by cutting the frame pieces accurately.
Check each measurement twice before making the cut. Small errors can accumulate and make the finished cabinet difficult to square.
A square is particularly important during assembly.
After connecting each section, check that the corners remain at 90 degrees. Do not wait until the entire cabinet is assembled to discover that the frame has shifted.
Use Pocket-Hole Joinery
Pocket holes are popular in DIY furniture because they allow strong joints without complicated traditional woodworking techniques.
The Home Depot example uses a pocket-hole jig and screws to connect its 2×2 frame pieces and plywood components.
The technique requires careful positioning, but it is approachable for many home woodworkers.
If you are new to pocket-hole construction, practice on scrap wood first. This allows you to confirm the correct drilling depth and screw length before working on the actual furniture.
Always use the screw length appropriate for the material thickness.
Add Shelves and Dividers
Shelves make the console more useful, but they should be placed according to the equipment they will hold.
Measure the height of your devices before fixing the shelf positions.
If you use adjustable shelf pins, future changes are easier. Fixed shelves can provide stronger permanent construction but offer less flexibility.
Ana White’s Benchmark Media Console plans illustrate both approaches: shelves can be installed as fixed components using pocket holes or prepared for adjustment using shelf pins.
For a minimalist design, fewer carefully positioned shelves can often look better than many small compartments.
Plan Cable Management Early
Cable management should not be treated as an afterthought.
Modern TVs often connect to several devices, and those cables need somewhere to go. HDMI cables, power cords, Ethernet cables, speaker wires, and USB cables can quickly turn a clean console into a messy area.
Commercial TV furniture increasingly incorporates cable openings for this reason.
IKEA’s current BESTÅ TV benches include multiple cable outlets at the back, allowing cords to remain accessible while keeping them less visible.
Your DIY stand can use the same principle.
Create appropriately sized openings in the rear panel for cables to pass through. Position them according to the locations of your outlets and equipment.
Measure the cable paths before cutting the back panel.
Leave Room for Airflow
Electronics generate heat.
A cabinet that completely surrounds a receiver, console, or other heat-producing device may not be the best design.
Open-back compartments can provide useful airflow while also making cables easier to connect.
If you prefer closed doors, avoid designing tiny sealed compartments around equipment that requires ventilation.
Check the manufacturer’s recommendations for your individual electronics before enclosing them.
The minimalist appearance should never come at the expense of practical equipment placement.
Build the Back Panel
The back panel helps stabilize the furniture and gives it a finished appearance.
Many DIY plans use thinner plywood for the back than for the main structural panels. Ana White’s Benchmark Media Console, for example, specifies ¼-inch plywood for the back.
A full back can improve rigidity, but it should be designed around cable access.
You may need openings for power cords, HDMI connections, Ethernet cables, or ventilation.
A partially open back can sometimes be the better option for a media console because it simplifies both wiring and airflow.
Sand Before Finishing
Good finishing starts with proper preparation.
Sand exposed plywood edges and wooden surfaces until they are smooth. Pay particular attention to areas that will be touched frequently.
If you plan to paint, fill visible screw holes and imperfections with an appropriate wood filler before sanding.
Ana White’s finishing guidance also recommends filling exposed holes, allowing the filler to dry, and sanding the project before applying the final finish.
Do not rush this stage.
Paint can make imperfections more noticeable rather than hiding them.
Choose Paint or Stain
The finish depends on the style you want.
White or warm neutral paint can create a clean Scandinavian-inspired appearance. Black or charcoal can provide a stronger contemporary look.
Natural wood stain works well when you want the grain to become part of the design.
You can also combine finishes. For example, a painted cabinet with a natural wood top can create contrast without adding decorative complexity.
Apply thin, even coats and allow adequate drying time according to the product instructions.
The exact number of coats depends on the finish and material.
Consider a Floating Design
A wall-mounted TV console can make a room feel more open because there is no large furniture footprint touching the floor.
It can also make cleaning underneath easier.
However, a floating design requires proper wall attachment.
Do not assume that drywall alone can support the weight of a loaded cabinet. The mounting system must be appropriate for the wall structure and the weight involved.
If you are uncertain about the wall construction or load requirements, professional assistance is sensible.
A minimalist appearance is not worth compromising structural security.
Think About TV Safety
TV furniture needs to be stable.
The U.S. Consumer Product Safety Commission recommends securing televisions and furniture to the wall to help prevent dangerous tip-over incidents. CPSC also advises using sturdy, low furniture designed to hold a television and keeping heavier objects on lower shelves.
In a February 2026 safety reminder, CPSC reported an estimated average of 17,800 emergency-department injuries per year from furniture and TV tip-overs during 2020–2022. The agency reported that 44% of those victims were under 18.
This makes anchoring an important part of the project rather than an optional finishing detail.
If the television is not wall-mounted, follow the TV manufacturer’s instructions for securing it.
Anchor the Finished Furniture
After completing the TV stand, position it where you want it and secure it appropriately.
CPSC’s Anchor It campaign specifically recommends anchoring TVs and furniture to the wall. It also advises placing TVs on sturdy, low bases and pushing the TV back as far as possible when anchoring is not possible.
Keep cords organized and away from areas where children can easily reach them.
Do not put toys, remotes, or other attractive objects in locations that might encourage children to climb the furniture.
A beautiful DIY project is only successful when it is also stable and safe.
Adapt It for a Small Room
Small spaces benefit from restraint.
Instead of building a large entertainment center, consider a narrow console with one or two compartments.
A shallow design can preserve walking space while still supporting the television.
Wall mounting can also reduce the visual weight of the furniture, especially when the room already contains several large pieces.
Use closed storage for items you do not want visible and keep open shelving limited to essential equipment.
The minimalist approach works particularly well here because the goal is to provide the necessary function without filling every available section of the wall.
Adapt It for a Bedroom
A bedroom TV stand usually does not need as much equipment storage as a living-room console.
A compact cabinet can hold a streaming device, remote controls, books, or a small game console.
Keep the design visually quiet.
Natural wood, soft neutrals, or muted colors can blend more easily with bedroom furniture.
If the TV is mounted on the wall, a low floating console can provide a useful surface without making the television wall feel heavy.
Build a Gaming Version
A gaming-focused TV stand has slightly different requirements.
You may need space for a console, controllers, charging equipment, headphones, games, and networking devices.
Ventilation becomes particularly important because gaming hardware can generate considerable heat.
Open shelves can make frequently used equipment easier to access.
Cable management also deserves extra attention because gaming setups often involve multiple HDMI, power, Ethernet, and accessory cables.
Design the storage around your actual gaming equipment rather than creating empty compartments just for appearance.
Keep the Design Minimal
Modern minimalist furniture is often defined by what it leaves out.
Avoid unnecessary decorative trim, excessive handles, complicated shapes, and too many visible objects.
Straight lines and balanced proportions can create a modern appearance without expensive materials.
You can also hide visual clutter behind flat cabinet doors.
If you want a more natural appearance, let the wood grain provide the visual interest instead of adding decorative details.
Simple construction can produce sophisticated furniture when the proportions are right.
Common Mistakes to Avoid
One of the most common mistakes is cutting material before confirming the final dimensions.
Another is forgetting to account for cable connections.
Some builders also make the compartments too small for actual equipment.
Ignoring ventilation can create another problem.
Poorly squared frames may produce doors that do not align correctly.
Using the wrong screw length can damage the material or produce weak joints.
Finally, skipping wall anchoring can create a serious safety issue.
Take time during the planning stage and many of these problems can be avoided before they become expensive repairs.
A Simple Build Sequence
A practical construction sequence looks like this:
Measure the room and television.
Choose the overall width, depth, and height.
Plan storage compartments and cable openings.
Prepare a cut list.
Cut the frame and panels.
Build and square the frame.
Install dividers and shelves.
Add the back panel and cable openings.
Sand the entire unit.
Fill visible imperfections.
Apply paint, stain, or another finish.
Install doors, drawers, or hardware if included.
Position the stand and secure it appropriately.
This order keeps the project organized and makes it easier to identify mistakes before the finishing stage.
Final Thoughts
Building a modern minimalist TV stand is less about complicated woodworking and more about good planning. The strongest design begins with accurate measurements of the television, room, equipment, and available wall space. From there, materials such as ¾-inch plywood and 2×2 lumber can be used to create a sturdy frame with a clean contemporary appearance.
Real-world furniture examples also show that modern TV consoles do not need to be extremely deep. Cable openings, sensible storage, and accessible electronics can make a relatively simple piece much more functional.
Most importantly, safety should remain part of the design from the beginning. CPSC recommends anchoring TVs and furniture securely and using sturdy, low bases when appropriate. A carefully built console should therefore combine style, storage, cable management, durability, and stability rather than focusing on appearance alone.
The best DIY TV stand is ultimately one designed specifically for the room it will occupy. When you measure carefully, keep the proportions balanced, plan cable routes before assembly, and choose storage based on your actual equipment, even a relatively straightforward woodworking project can become a polished piece of furniture that looks intentional and lasts for years.
FAQs
What wood is best for a DIY TV stand?
¾-inch plywood is a practical option for many DIY designs because it provides a stable panel material and can be painted or finished. Solid wood can also be used when you want a more traditional furniture appearance.
How wide should a TV stand be?
A useful starting point is to make the stand slightly wider than the television. This generally creates better visual balance and leaves some space on either side. Always consider the room and equipment before choosing the final measurement.
How deep should a minimalist TV stand be?
There is no universal depth. Measure the equipment you plan to store and allow room for connectors and cables. Current commercial examples show minimalist TV benches around 15 to 16½ inches deep, although your project may need more or less.
How can I hide cables in a DIY TV stand?
Plan cable openings in the back panel before assembly. Place them near the television, power outlet, and electronics so cables can travel between components without hanging across the front of the furniture.
Should a DIY TV stand be anchored?
Yes. TV and furniture tip-over prevention is an important safety consideration. CPSC recommends anchoring TVs and furniture to the wall and using sturdy, low furniture designed to support a television.